Choosing the right faucet can change how your sink looks, feels, and works every day. It is not only a matter of finish or price. The spout must reach the basin comfortably, while the handle should remain easy to use with wet or soapy hands. A faucet that looks beautiful in a showroom may splash water across a shallow sink at home. That small mistake can become irritating quickly.
Interior designer Barbara Sallick, cofounder of Waterworks, describes the faucet as “the jewelry of the kitchen.” Her observation highlights an important balance. The faucet should add character, but it must also support practical routines. Before choosing a model, measure the sink holes, countertop thickness, basin depth, and available wall space. Check whether the spout swivels far enough. Think about how you wash large pans, fill tall bottles, or clean muddy vegetables.
This guide explains how to choose the right faucet for your sink through seven practical tips. You will compare mounting styles, faucet height, spray functions, materials, water efficiency, and installation needs. These details matter more than a fashionable photograph. Still, no checklist can predict every household habit. A compact pull-out faucet may suit one kitchen, yet feel restrictive in another. Your first choice might also be imperfect. That is normal. Careful observation, accurate measurements, and honest reflection usually lead to a better decision.
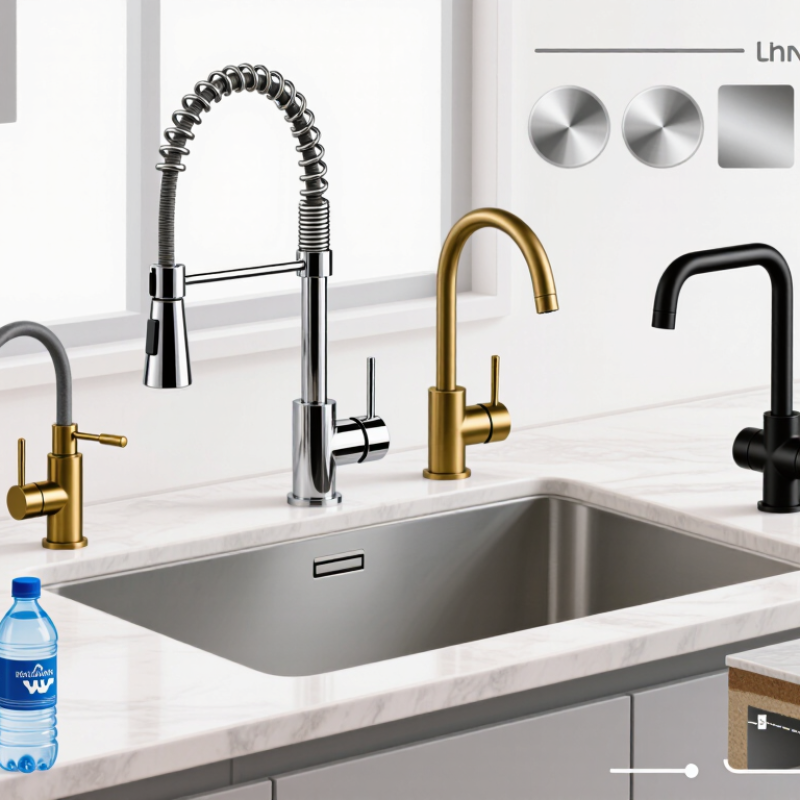
Before choosing a faucet, inspect your sink’s mounting holes and configuration. Most sinks use one, two, or three predrilled holes. Measure the distance between hole centers, not their outer edges. A single-hole faucet fits a compact opening and often includes an integrated control handle. Three-hole sinks may need separate handles, a spout, and a cover plate for unused spaces. Do not assume every plate hides every hole neatly.
Check whether the faucet mounts on the sink, countertop, or wall. Deck-mounted models require a flat, stable surface beneath the faucet base. Wall-mounted models need secure plumbing connections and proper support inside the wall. For vessel sinks, confirm the faucet has enough height and reach. The water stream should land near the basin center, not against its rim.
Use a tape measure before ordering. Check backsplash clearance, handle movement, spout reach, and the length of the supply lines. Leave room to tighten connections underneath. I once measured the hole spacing correctly but overlooked a thick countertop edge. The faucet fit, yet the mounting nut could not thread fully. That mistake was avoidable. Installation instructions can vary, so verify dimensions with the actual sink and mounting hardware. A small paper template can reveal problems early.
| Tip | What to Check | Common Sink or Faucet Configuration | Typical Measurements | Why It Matters | Selection Guidance |
|---|---|---|---|---|---|
| 1 | Identify the sink mounting style | Top-mount, undermount, vessel, integrated, or wall-mounted sink | Measure the distance from the sink rim or countertop to the faucet mounting surface | The mounting style determines whether the faucet belongs on the sink deck, countertop, or wall. | Use a deck-mounted faucet for a sink or countertop with faucet holes. Use a wall-mounted model only when the wall plumbing and spout reach are suitable. |
| 2 | Count the existing faucet holes | One-hole, two-hole, or three-hole sink or countertop | A common three-hole centerset layout is 4 inches (102 mm) between the outer hole centers. | A faucet must cover the existing holes or use a compatible base plate. Unused holes may otherwise remain visible. | Choose a single-hole faucet for one opening, a centerset faucet for closely spaced holes, or a widespread faucet for separated holes. |
| 3 | Match the hole spacing | Centerset or mini-widespread versus widespread configuration | Centerset: typically 4 inches (102 mm). Widespread: commonly 8–16 inches (203–406 mm), depending on the faucet design. | Incorrect spacing can prevent the handles and spout from aligning with the existing holes. | Measure from the center of one hole to the center of the next. Do not measure from the outside edges of the holes. |
| 4 | Check the faucet height and reach | Low-arc, standard-arc, or high-arc spout | Compare spout height with the available space above the sink and spout reach with the distance to the drain. | A faucet that is too tall may strike a shelf or mirror; one with insufficient reach may discharge water near the sink edge. | Keep the water stream directed toward the basin drain area and confirm that the handle can move freely. |
| 5 | Verify countertop and sink clearance | Thick countertops, backsplash locations, undermount sinks, and vessel sinks | Measure countertop thickness, backsplash distance, mounting-hole diameter, and the space behind the faucet. | Limited clearance can make installation difficult and may restrict handle movement or supply-line connections. | Confirm the faucet’s maximum deck thickness and required hole diameter in its installation specifications. |
| 6 | Choose the operating configuration | Single-handle, two-handle, bridge, or touchless faucet | Single-handle faucets generally require one hole; two-handle and bridge designs commonly require multiple holes. | The control layout affects compatibility, ease of use, cleaning, and the amount of deck space required. | Select a configuration that matches the hole pattern and leaves enough room for handles, soap dispensers, or other accessories. |
| 7 | Confirm plumbing and functional requirements | Standard supply connections, pull-down or pull-out spray, swivel spout, and water-saving aerator | Check supply-line length, connection size, spray-hose clearance, and the faucet’s flow rate. | A faucet can fit the sink but still be unsuitable if the connections, hose movement, or water delivery do not meet installation needs. | Compare the product specifications with the existing shutoff valves, available cabinet space, and local water-efficiency requirements. |
Measurement reminder: Record hole count, hole diameter, center-to-center spacing, countertop thickness, faucet height, and spout reach before selecting a replacement faucet.
One lever controls water temperature and flow with one hand. This helps when your other hand holds a wet pan. Single-handle designs also suit compact sinks and busy kitchens.
Place it beside the spout for quick access. Avoid positioning it behind the faucet near a backsplash. The lever may hit the wall during use or installation.
Two handles provide finer temperature adjustment. They also create a traditional appearance. However, they usually need two hands and wider mounting holes.
Lever handles are often easier for children and people with limited grip strength. Cross handles can look elegant. Their grooves may collect mineral deposits.
Solid brass feels heavy and offers dependable strength. Stainless steel resists corrosion in damp areas. Zinc alloy may cost less, but lighter parts can wear sooner.
Brushed finishes hide fingerprints and small water marks well. Polished surfaces show more spots. Matte finishes look calm, but hard-water minerals may gather around the aerator.
Check the stated flow rate and look for independent performance testing. A pause button can reduce water waste while washing dishes. It may feel awkward during quick tasks.
Compare the spout height and reach with your sink. Poor measurements can send water onto the counter. Check mounting holes, cabinet space, replacement cartridges, warranty terms, and installation instructions.
Do not choose only by color or showroom lighting. Touch a finish sample when possible. I still underestimate cabinet space sometimes. That mistake deserves another measurement.
Choosing the right faucet for your sink begins with understanding the sink’s mounting style and configuration. Check whether it requires a single-hole, centerset, or widespread faucet, and confirm that the number and spacing of mounting holes are compatible. Next, compare the faucet’s size, spout reach, and height with the sink basin to ensure water flows comfortably without excessive splashing or limited workspace. These measurements are essential when learning how to choose the right faucet for your sink.
Consider which handle design best suits your daily routine, such as a single lever for easy temperature control or separate handles for a more traditional setup. Also evaluate the faucet’s material, finish, water-saving features, and overall durability. Before purchasing, review installation requirements, access to replacement parts, cleaning needs, and warranty coverage. A faucet that is easy to maintain and properly matched to your sink can provide better performance, convenience, and long-term value.

 Aqua Bathroom